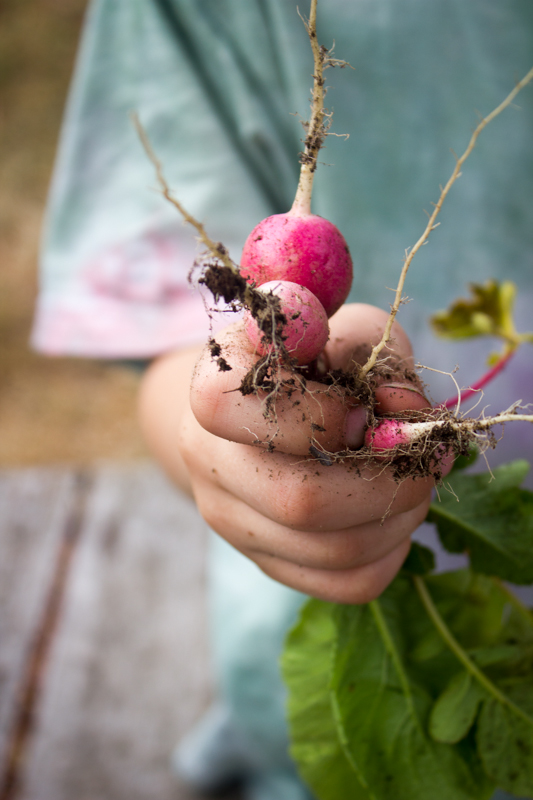
 "Has this blog been abandoned, or moved elsewhere?" A few months ago I received this email from a reader. My response was that, though it would very much appear that way, in fact no, not abandoned, just on hold. At least that had been my plan when I finally allowed myself to take some time off just before the birth of my daughter. Everyone says it goes fast--and whoosh! it is now two years later. In my time away I have been deeply relishing the days with my 1.5 and 3.5 year old darlings. Trying to be there. Trying to be present. Trying to be in the moment. Hell, most days just trying to keep the house standing. Above is my very proud son's hand with french breakfast radishes from his "very own garden". He loves making radish toasts. They both try to race each other to the cherry tomato patch. I am so grateful for these days with them. But with pre-school starting up this past week, and this weekend me even getting away for the first time in years for a writing conference, the gears are slowly starting to turn once again. So, not abandoned. But yes, moved elsewhere for a very special little while. And back again with a great deal of new perspectives and appreciation. Stay tuned. | ||||||||||||||||


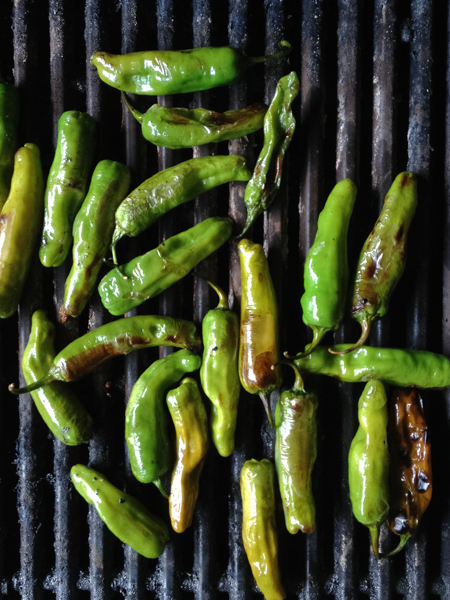
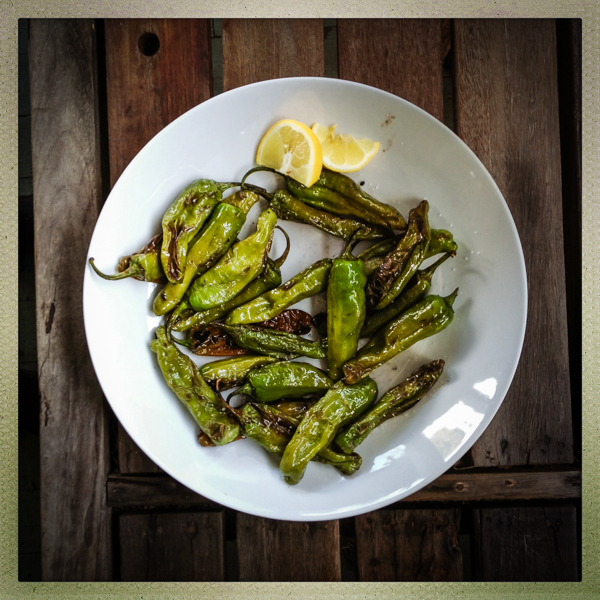
This mild pepper from Japan has become quite the culinary rage over the last handful of years. I first had them as a snack in a benefit cooking master class for Slow Food NYC, and have been growing them in my garden ever since. Shishito peppers are slender, bright green, and about the length of your index finger. They are super flavorful yet mild, with about one in a dozen delivering a memorable amount of heat. Consider it a party game. I love serving a huge platter of grilled shishitos with cold cocktails at the start of a big summer dinner party. Quick, easy, impressive, slightly unusual and pretty much universally adored--there should be no hesitation in adding these to the menu. Padron peppers can be prepared and served the same way, but will be hotter in flavor overall. We are in high shishito season right now, so keep an eye out at the market, and definitely grow your own next summer.
| ||||||||||||||||||||||


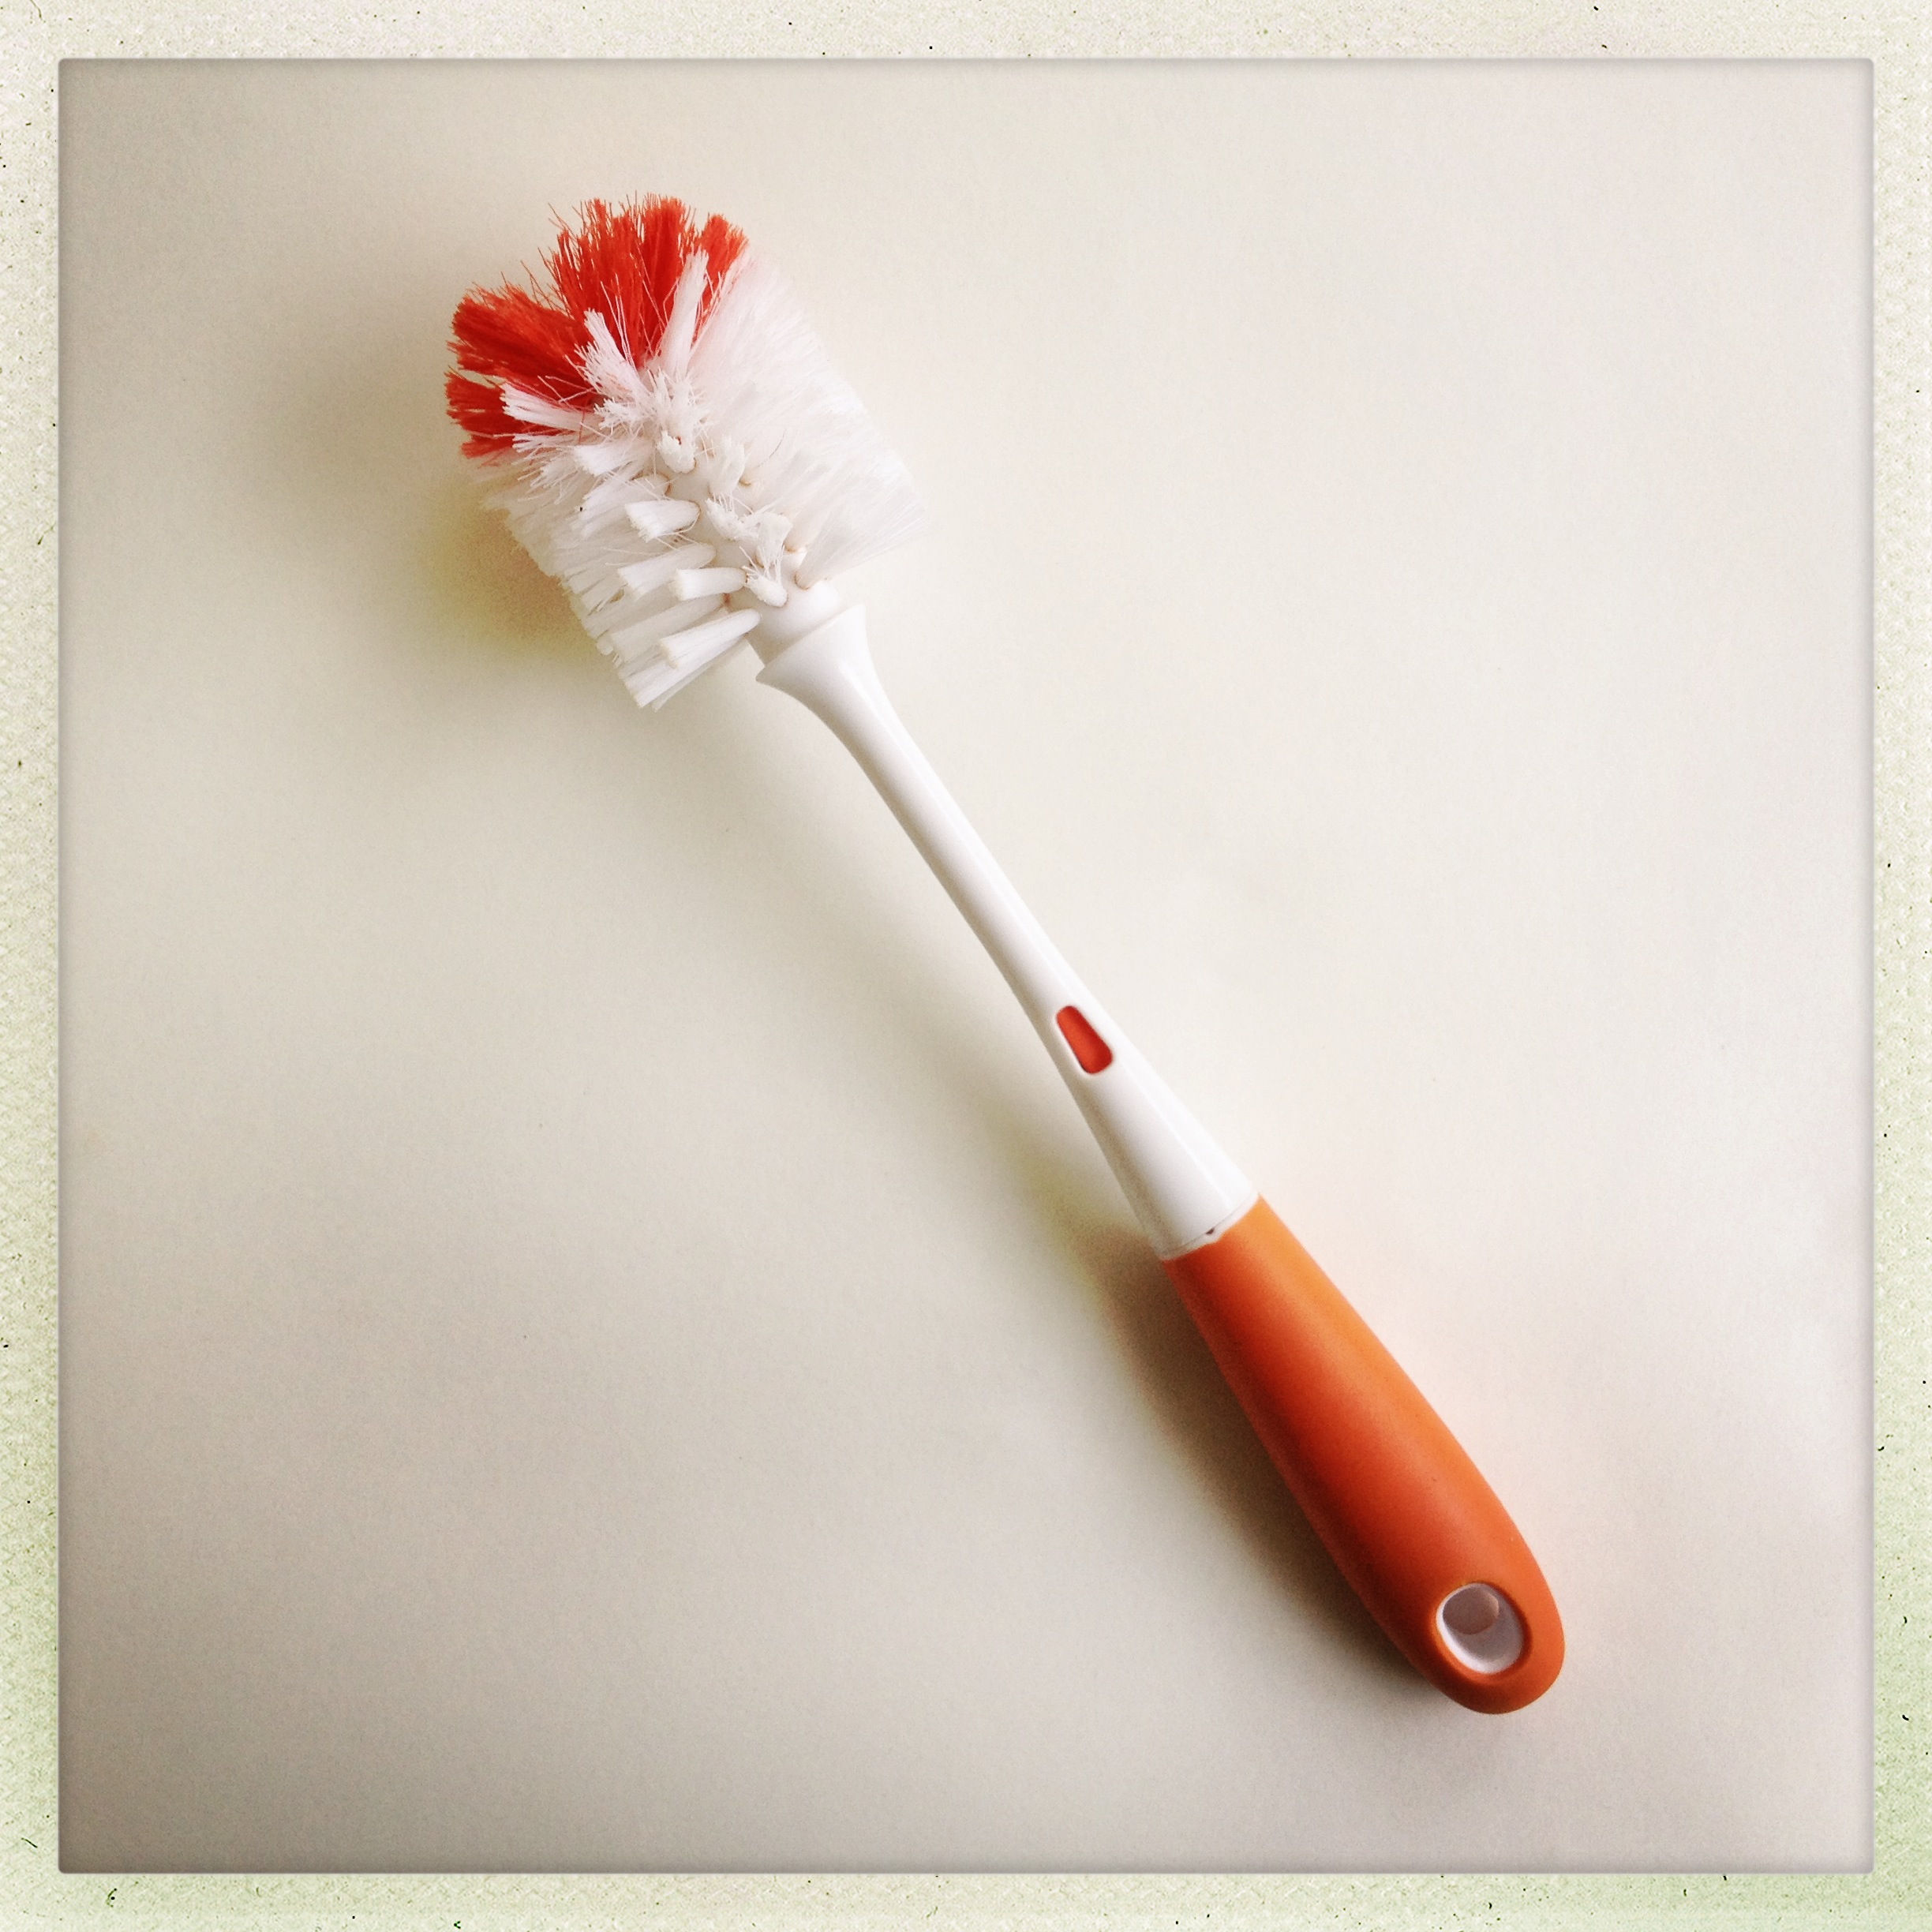
Never had one of these in my life until I had a kid. Should have had one decades earlier. (this is the one I own. A friend recently captioned a photo on facebook of the same one, titling it "Ziggy Starbrush") My bottle brush sits in our dish rack right next to the sink. It is there to, as stated, wash baby bottles. But over the past 21 months, I have found myself reaching for it again and again for lots of hard-to-scrub objects that were once dreaded chores.
These really should be marketed farer and wider than baby registry check-lists. Any other brilliant uses you've come across? Let me know in the comments. | ||||||||||||||||


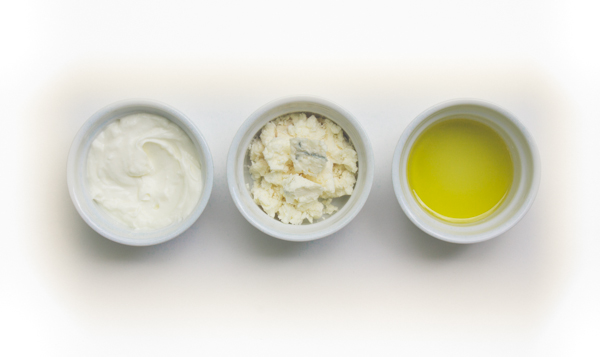 This is a rich, luxurious, and even slightly healthier take on a classic blue cheese dressing. It certainly marries beautifully with a big old bacon-scattered wedge salad, or as a spread on a tomato and wheat toast sandwich. But also try it alongside grilled zucchini, eggplant, and even grilled peaches. Blue cheeses tend to be pretty robust and on the salty side, so taste as you go and you may not need to add any additional salt at all.
| ||||||||||||||||||||||


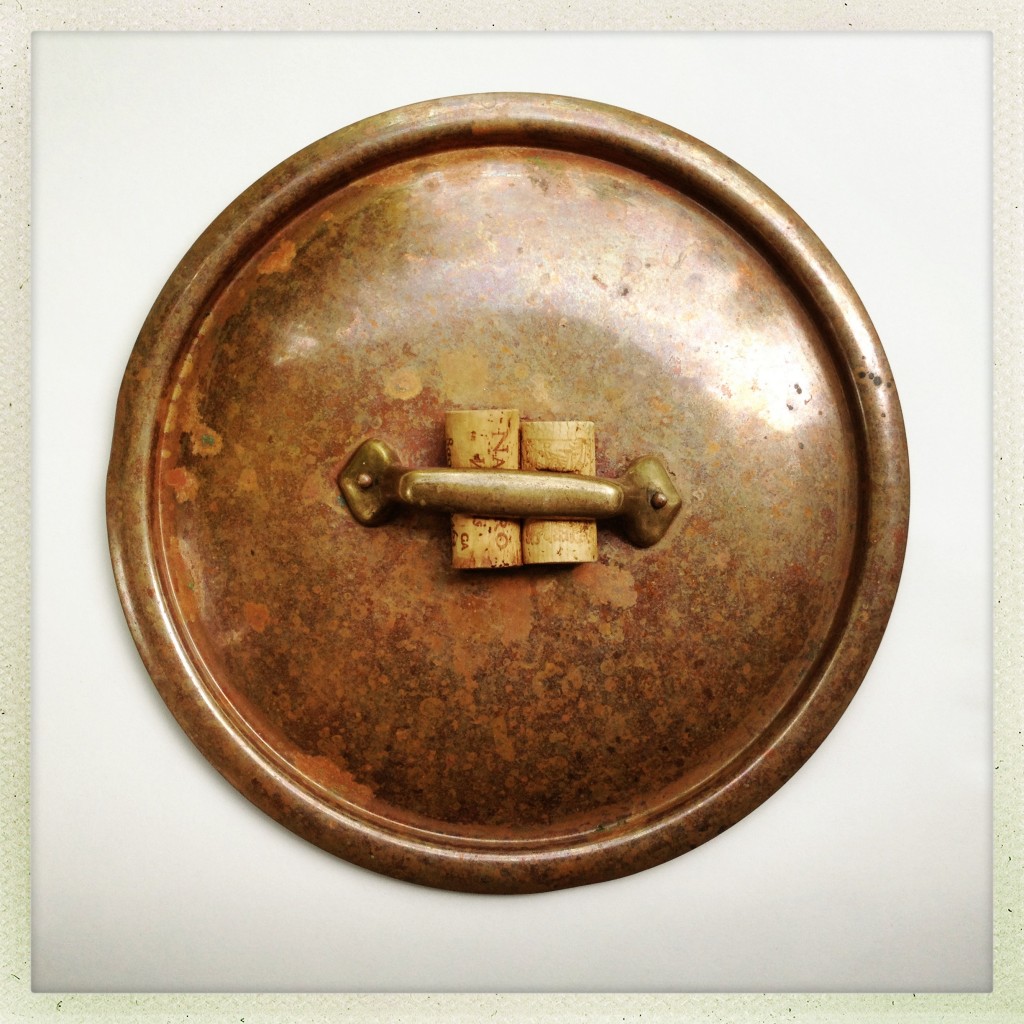
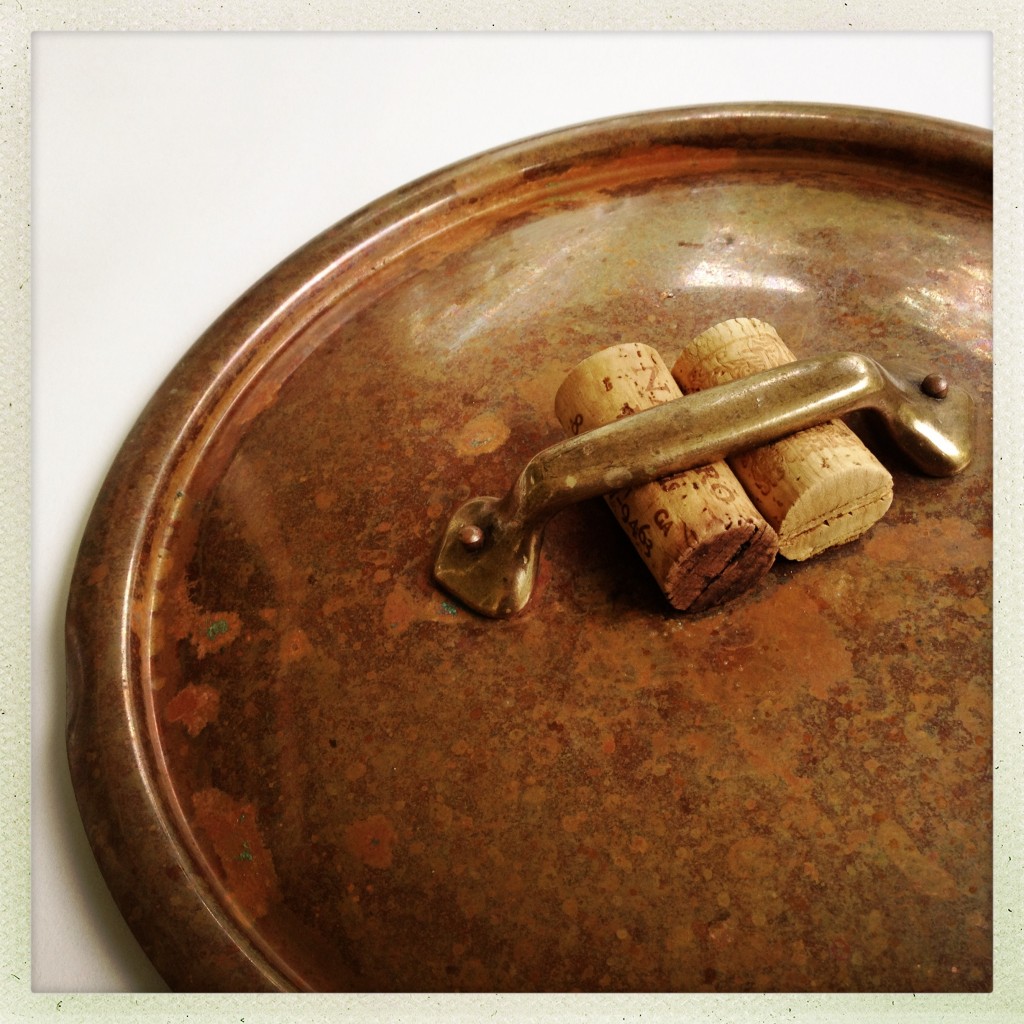
Most of our cookware have lids that are completely constructed of metal of some variety. Especially the copper pieces. They are my favorite to cook with, stellar conductors of heat, but OUCH if you grab the lid without thinking. Above is the lid from our prized giant stock pot that forever sits on our stovetop, as it is so darn pretty. A few years ago we were at a friend's for dinner who had the same one, and spotted this genius solution for the scalding handle or the annoyance of constantly searching for a pot holder. Jam two corks from previously enjoyed wine bottles (we happened to be able to dig up a few), under the handle and problem solved. The corks don't conduct any of the heat, and they even stay put through (hand) washing.
| ||||||||||||||||


|
|
{ welcome! }
 Catie Baumer Schwalb is a chef, food writer and photographer, who splits her life between the city and the country. Not too long ago Catie was a New York City based actress and playwright for more than a decade. She has her Master of Fine Arts from the National Theater Conservatory, and her Grand Diplôme in classic culinary arts from the French Culinary Institute in New York City.
... Read More ≫
Catie Baumer Schwalb is a chef, food writer and photographer, who splits her life between the city and the country. Not too long ago Catie was a New York City based actress and playwright for more than a decade. She has her Master of Fine Arts from the National Theater Conservatory, and her Grand Diplôme in classic culinary arts from the French Culinary Institute in New York City.
... Read More ≫{ get in touch }
{ what's new }
September 12, 2015
August 19, 2013
August 15, 2013
August 13, 2013
August 1, 2013
{ favorites }
{ archives }
Appetizers / Breads & Pastry / Breakfast / Cakes / Canning / Condiments / Dinner / DIY foods / Drinks / Fall / favorites / Grains / Holidays / Local / Noodles & Pasta / Pies & Tarts / Poultry / Salads / Seafood / Snacks / Soup / Spring / Summer / Sweets / Techniques / Vegetables / Vegetarian / Winter /
{ currently reading }
|


